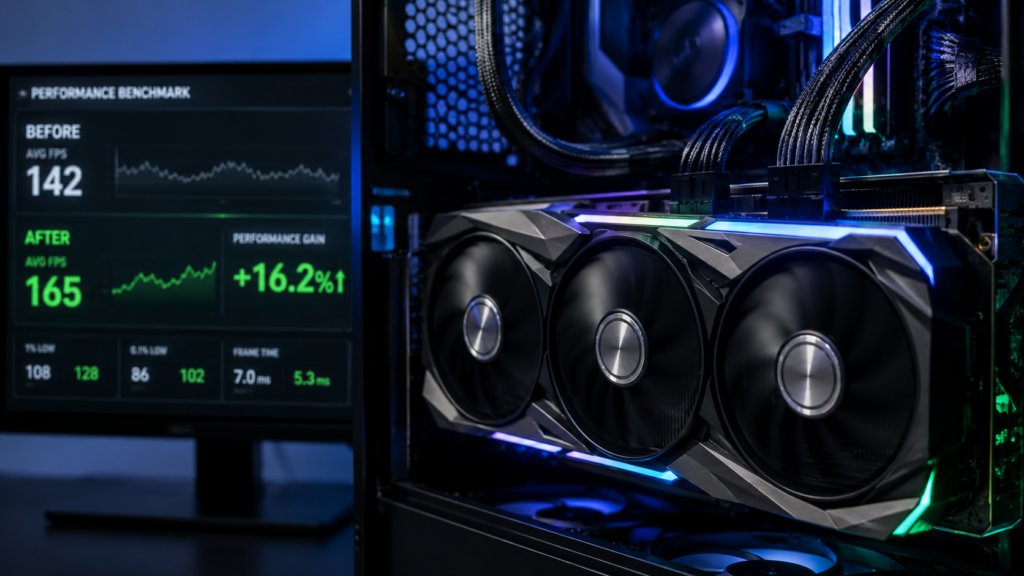
If you’re dropping below 60 FPS in Overwatch 2, your settings are almost certainly the problem — not your GPU. Blizzard’s engine is surprisingly scalable, and a few targeted changes can double your frame rate without making the game look noticeably worse. This guide covers the best settings for Overwatch 2 PC FPS across every hardware tier, from budget GPUs to high-end rigs.
Why FPS Matters More in Overwatch 2 Than Most Games
Overwatch 2 is a competitive shooter built around fast reaction times and smooth tracking. At 60 FPS you’re getting a new frame every 16.7ms. At 144 FPS that drops to 6.9ms — a real, measurable advantage when flicking onto a Tracer or timing a Lucio boop.
Beyond competitive edge, high FPS simply feels better. The game’s animations, abilities, and hit registration all read more cleanly above 144 FPS. If your monitor supports 144Hz or higher, leaving FPS on the table is a waste of hardware you already own.
In-Game Display Settings
Start here before touching anything else. These are the highest-impact options.
Resolution and Render Scale
- Resolution: Match your native monitor resolution (1080p, 1440p, or 4K)
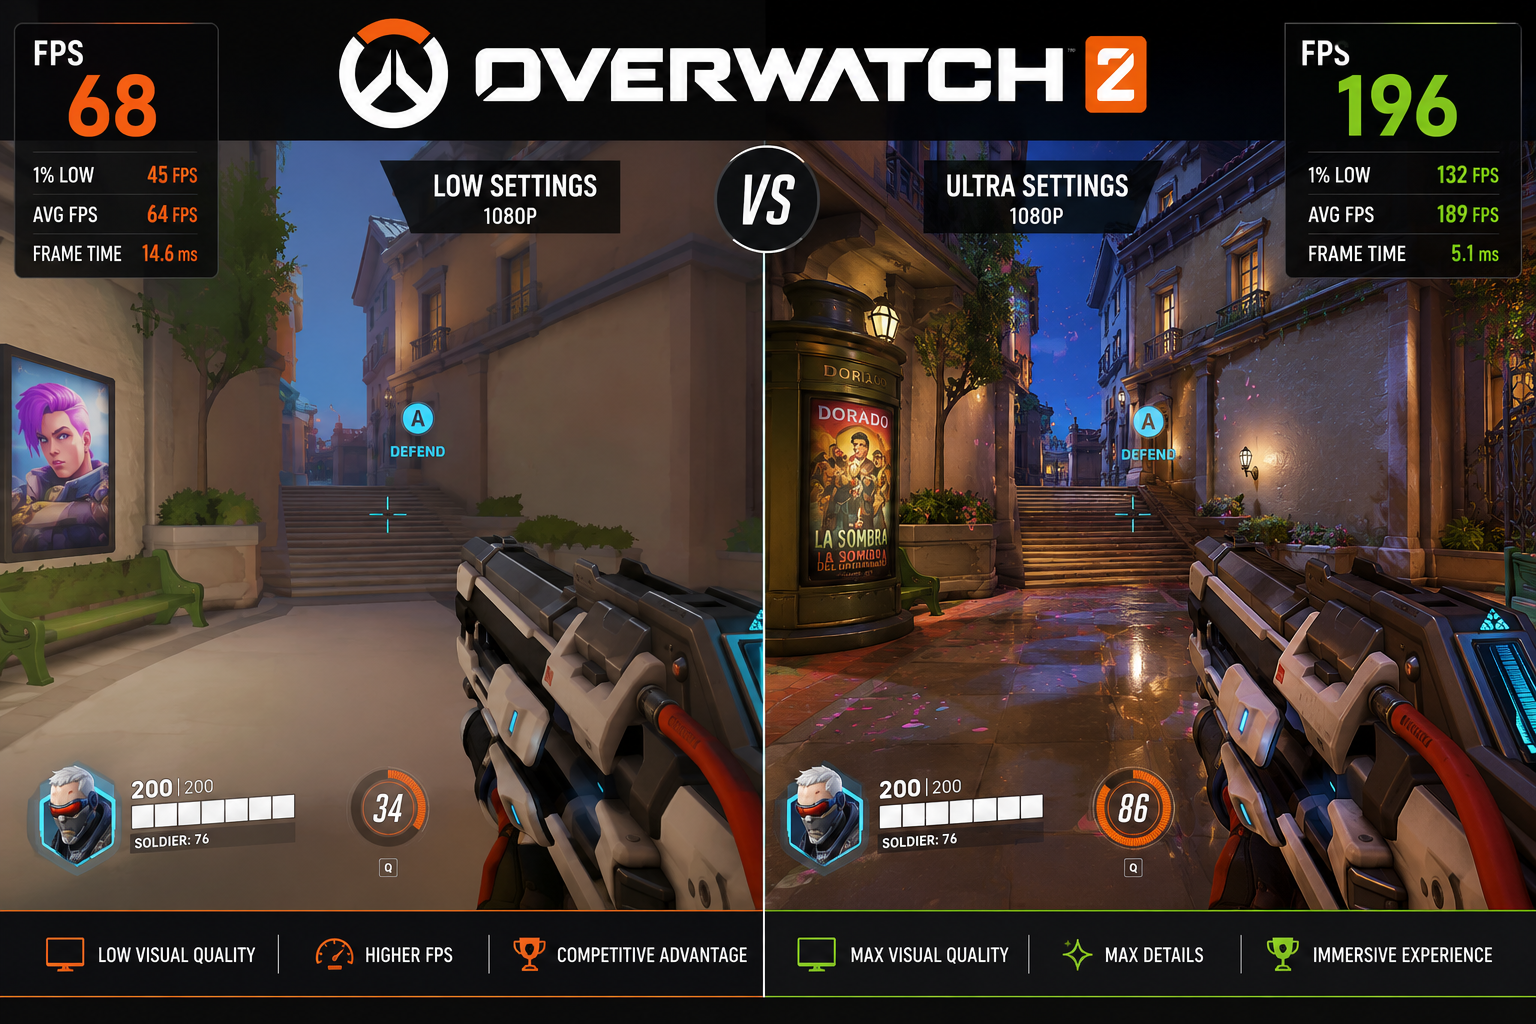
- Render Scale: Drop to 75% on mid-range GPUs, 50% on budget hardware. This is the single biggest FPS lever in the game. At 75% on a 1080p monitor you’re rendering at roughly 810p — barely visible in motion.
- Display Mode: Always set to Fullscreen, not Borderless Window. Borderless adds latency and reduces GPU priority.
- V-Sync: Off. Enable it only if you have severe screen tearing and no G-Sync/FreeSync.
- Triple Buffering: Off
- Frame Rate Cap: Set to your monitor’s refresh rate + 10 (e.g., 154 FPS for a 144Hz display). Uncapped wastes GPU power and increases heat with no benefit.
Graphics Quality Settings
Quality Presets
Blizzard’s “Medium” preset is actually a solid baseline for most systems. Don’t start from High and work down — start from Low and only raise settings that visibly bother you.
The Settings That Cost the Most FPS
These have the largest GPU impact. Cut them first:
- Shadow Detail: Set to Low or Off. Shadows are one of the most expensive effects in any renderer. You lose almost nothing competitively.
- Local Fog Detail: Low
- Dynamic Reflections: Off
- Anti-Aliasing: Switch from MSAA to FXAA or TAA. MSAA 4x can cost 20-30% performance. TAA at medium quality is almost identical visually at a fraction of the cost.
- Ambient Occlusion: Off
- Model Detail: Low — hero models look nearly identical on Low vs. Ultra in actual gameplay
- Effects Detail: Low — reduces particle complexity, marginally improves readability too
- Lighting Quality: Low
- Texture Quality: Medium on 6GB+ VRAM GPUs, Low on 4GB cards. Textures load from VRAM, so this setting only matters if you’re VRAM-constrained.
Settings You Can Keep Higher
These have minimal performance cost:
- Texture Filtering Quality: High — almost no FPS cost, improves ground and surface clarity
- Local Reflections: Medium — adds visual polish on surfaces for under 2% GPU hit
- Refraction Quality: Medium
NVIDIA and AMD GPU-Specific Tweaks
NVIDIA (GeForce Experience / NVCP)
- NVIDIA Reflex: Enable Reflex + Boost in-game. This reduces system latency by 10-30ms on most systems and has a near-zero FPS cost. It’s one of the best free upgrades available.
- Image Scaling (NIS): If you have a GTX 1060/1660 or older RTX card, enable NIS at 77% quality as a driver-level alternative to in-game render scale.
- Shader Cache Size: Set to Unlimited in NVCP — prevents shader stutter on map load.
- Power Management Mode: Prefer Maximum Performance in NVCP.
- Texture Filtering – Quality: Set to High Performance in NVCP.
AMD (Radeon Software)
- Radeon Anti-Lag: Enable. Reduces input latency, similar benefit to NVIDIA Reflex.
- Radeon Image Sharpening: Enable at 80% — compensates for visual softness from reduced render scale.
- Anti-Aliasing Mode: Override to Use Application Settings.
- Wait for Vertical Refresh: Off Unless Application Specifies.
Hardware Tier FPS Expectations
These figures are based on running the optimized settings above at 1080p. Expect 10-15% lower at 1440p and 30-40% lower at 4K.
Budget Tier
| GPU | RAM | Expected FPS (Optimized) |
|---|---|---|
| GTX 1060 6GB | 8GB DDR4 | 90–120 FPS |
| RX 580 8GB | 8GB DDR4 | 80–110 FPS |
| GTX 1650 Super | 16GB DDR4 | 100–130 FPS |
Recommended settings: Render Scale 50–60%, all quality settings on Low, FXAA anti-aliasing.
Mid-Range Tier
| GPU | RAM | Expected FPS (Optimized) |
|---|---|---|
| RTX 3060 12GB | 16GB DDR4 | 160–200 FPS |
| RX 6650 XT 8GB | 16GB DDR4 | 150–190 FPS |
| RTX 4060 8GB | 16GB DDR5 | 190–240 FPS |
Recommended settings: Render Scale 75–85%, Texture Quality Medium, Effects Low, TAA anti-aliasing.
High-End Tier
| GPU | RAM | Expected FPS (Optimized) |
|---|---|---|
| RTX 4080 16GB | 32GB DDR5 | 300–400 FPS |
| RX 7900 XTX 24GB | 32GB DDR5 | 280–360 FPS |
| RTX 4090 24GB | 32GB DDR5 | 400–500+ FPS |
Recommended settings: Render Scale 100%, Texture Quality High, Shadow Detail Medium, TAA or DLAA. At this tier, a 240Hz or 360Hz monitor becomes the bottleneck.
Not sure what FPS your specific GPU should be hitting? Use the Overwatch 2 FPS calculator at fpscalculator.net to get a personalized estimate based on your exact CPU, GPU, and resolution — takes 30 seconds.
Windows and System-Level Optimizations
In-game settings only go so far. Your OS can quietly throttle performance.
- Game Mode: Enable it. Press
Win + G, go to Settings, toggle Game Mode on. Reduces background process interference. - Hardware-Accelerated GPU Scheduling (HAGS): Enable in Settings → Display → Graphics Settings. Reduces CPU overhead on GPU calls. Works well on RTX 30/40 series and RX 6000/7000 series.
- Power Plan: Set to High Performance or Ultimate Performance in Control Panel. Balanced mode throttles CPU clock speeds.
- XMP/EXPO: Enable in BIOS. If your DDR4 RAM is running at 2133MHz instead of its rated 3200MHz+, you’re leaving 5-10% CPU performance on the table. Overwatch 2 is moderately CPU-bound, so this matters.
- Background Apps: Close Discord overlay if not needed (use browser-based Discord instead), close browser tabs, and disable GeForce Experience in-game overlay if you’re not using ShadowPlay.
The One Setting Most Players Ignore
CPU priority via Task Manager: After launching Overwatch 2, open Task Manager (Ctrl + Shift + Esc), find Overwatch2.exe, right-click → Set Priority → High. This tells Windows to give the game’s threads priority over background processes. It takes five seconds and can add 5-15 FPS on CPU-limited systems, particularly on older quad-core CPUs like the i5-8400 or Ryzen 5 2600.
Finding the Best Settings for Overwatch 2 PC FPS for Your Build
The right balance of settings depends entirely on your specific hardware. A GTX 1070 should not be running the same config as an RTX 4070 — the gap between them is enormous, and applying a “universal” Low preset to a high-end card wastes your hardware while applying High to a budget card tanks your FPS.
The best approach: benchmark your current FPS with the in-game frame counter (Ctrl + Shift + R), apply the changes above in order of impact, and retest after each group of changes. Render Scale and Shadows alone should account for the majority of your gains.
For a hardware-specific FPS target and to verify whether your current performance is normal for your GPU, the best settings for Overwatch 2 PC FPS are only as useful as the baseline you’re comparing against.
Quick-Reference Checklist
- [ ] Display Mode → Fullscreen
- [ ] V-Sync → Off
- [ ] Render Scale → 75% (mid) / 50–60% (budget)
- [ ] Shadow Detail → Low or Off
- [ ] Anti-Aliasing → TAA or FXAA
- [ ] Ambient Occlusion → Off
- [ ] Dynamic Reflections → Off
- [ ] NVIDIA Reflex or AMD Anti-Lag → On
- [ ] Windows Power Plan → High Performance
- [ ] XMP/EXPO → Enabled in BIOS
- [ ] HAGS → Enabled in Windows Graphics Settings