If your CPU is peaking at 95–100% during gameplay, you already know the symptoms: frame time spikes, stutters every few seconds, and an FPS counter that looks more like a roulette wheel than a performance metric. High CPU usage is one of the most common causes of poor gaming performance in 2026, and it’s fixable without buying new hardware — if you know where to look.
This guide walks through every practical step to lower CPU usage while gaming, from Windows settings and in-game tweaks to hardware upgrades when software optimizations aren’t enough.
Why CPU Usage Spikes During Gaming
Your CPU handles game logic, physics simulations, AI calculations, and feeding draw calls to the GPU. When it’s overwhelmed, your GPU starves — even a powerful RTX 5080 will underperform if the CPU upstream can’t keep up.
Common culprits:
- Background processes eating 10–20% of CPU headroom (browsers, Discord, Windows Update)
- Poorly optimized games with single-threaded bottlenecks
- Outdated or misconfigured drivers
- Power plan settings throttling clock speeds
- Thermal throttling when CPU temps exceed 90–95°C
Understanding which one is hitting you determines which fix to apply first.
Step 1: Identify the Real Bottleneck First
Before changing anything, open Task Manager (Ctrl+Shift+Esc) and switch to the Performance tab while your game runs in the background. Watch individual core usage — not just total CPU%. A CPU showing 60% total usage but one core pinned at 100% is still bottlenecked.
For deeper visibility, use HWiNFO64 (free). Set it to log per-core clocks, temps, and usage simultaneously. If you see one or two cores maxing out while others sit at 30–40%, you’re dealing with a single-threaded bottleneck — common in older game engines like GTA V and older Call of Duty titles.
Callout: Want to know exactly what FPS your CPU and GPU combo should be hitting in your game? Use the FPS Calculator at fpscalculator.net to get real-world FPS estimates based on your hardware — so you know if you’re leaving performance on the table.
Step 2: Kill Background CPU Consumers
This is the fastest win. Here’s how to lower CPU usage while gaming by trimming background load:
Disable Startup Programs
- Open Task Manager → Startup Apps tab
- Disable: OneDrive, Teams, Spotify, Discord auto-launch, any RGB control software you’re not actively using
- Restart, then recheck baseline CPU usage at idle — it should be under 5%
Close Browsers Before Gaming
Chrome and Edge each consume 2–8% CPU per open tab. Close them entirely or use a lightweight alternative. A browser with 15 tabs open can cost you 15+ FPS in CPU-bottlenecked scenarios.
Disable Xbox Game Bar and DVR
- Settings → Gaming → Xbox Game Bar → Off
- Settings → Gaming → Captures → Background recording → Off
These features run capture hooks that intercept DirectX calls and add measurable CPU overhead.
Disable Windows Search Indexing During Sessions
Search indexing can spike CPU usage unpredictably. Right-click the Start menu → Run → services.msc → find Windows Search → set Startup Type to Manual.
Step 3: Set the High Performance Power Plan
Windows’ Balanced power plan dynamically clocks your CPU down to save energy — during games, this creates micro-stutters as the CPU ramps back up after a quiet moment.
- Control Panel → Power Options → High Performance
- Or install Process Lasso (free tier available) and enable Performance Mode — it automatically switches plans when a game launches
For AMD Ryzen CPUs specifically, use the Ryzen High Performance plan available after installing AMD chipset drivers. It prevents the scheduler from incorrectly assigning threads to efficiency cores on hybrid designs.
Step 4: In-Game Settings That Reduce CPU Load
Some graphics settings are GPU-bound; others hammer the CPU. Knowing the difference lets you keep visuals high while reducing CPU stress.
CPU-Heavy Settings to Lower
- View Distance / Draw Distance — directly scales the number of objects the CPU must process each frame. Drop from Ultra to High for a meaningful reduction.
- NPC/AI Density — in open-world games like Cyberpunk 2077, dropping Crowd Density from High to Medium can reduce CPU usage by 8–12%
- Physics Quality — CPU-simulated physics (cloth, destruction, ragdolls) scale linearly with quality setting
- Simulation Rate / Tick Rate — in strategy and simulation games, lower the game speed or simulation frequency cap in settings
Settings That Are Mostly GPU-Bound (Safe to Keep High)
- Shadow quality (partially CPU)
- Texture resolution
- Anti-aliasing (DLSS/FSR/XeSS are GPU-side)
- Ambient occlusion
Pro tip: Enable DLSS 4, FSR 4, or XeSS in supported games. These upscaling technologies reduce the GPU rendering resolution, which in turn reduces the number of draw calls the CPU must generate — lowering CPU load as a side effect.
Step 5: Update and Configure Drivers
Outdated chipset drivers are a silent FPS killer, especially on AMD Ryzen platforms.
- AMD: Download the latest chipset driver from AMD’s site — not Windows Update. The chipset driver controls thread scheduling across CCD clusters on Ryzen 5000/7000/9000 series
- Intel: Update Intel Management Engine Interface and chipset INF drivers via Intel’s Driver & Support Assistant
- GPU drivers: Use DDU (Display Driver Uninstaller) to clean-install the latest GPU driver if you’ve had the same driver for more than 6 months
After updating, reboot and retest. Chipset driver updates alone have been documented to improve 1% lows by 10–15% on Ryzen 5000 systems.
Step 6: Fix Thermal Throttling
If your CPU runs above 90°C under load, it’s throttling — actively reducing clock speeds to protect itself, which tanks performance. Check temps in HWiNFO64 or Core Temp.
Quick fixes:
- Reapply thermal paste if it’s been more than 2–3 years (Thermal Grizzly Kryonaut or Conductonaut for extreme cases)
- Clean dust from heatsink/radiator fins — a clogged cooler can raise temps 15–20°C
- Ensure your case has positive airflow (more intake than exhaust, or balanced)
- Raise the CPU power limits (PL1/PL2) in BIOS if your motherboard defaults are conservative — some B650 boards cap Ryzen 7 7700X at 65W TDP when it should run at 105W
Hardware Tier: Realistic FPS Expectations After Optimization
Once you’ve applied software fixes, here’s what you can realistically expect across hardware tiers in demanding modern titles at 1080p:
| Tier | CPU | GPU | Avg FPS (1080p High) | 1% Lows |
|---|---|---|---|---|
| Budget | Ryzen 5 5600 / i5-12400 | RX 6600 / RTX 3060 | 80–110 FPS | 55–75 FPS |
| Mid-Range | Ryzen 7 7700X / i5-14600K | RX 7800 XT / RTX 4070 | 120–160 FPS | 90–120 FPS |
| High-End | Ryzen 9 9900X / i9-14900K | RX 9070 XT / RTX 5080 | 180–240+ FPS | 140–190 FPS |
If your actual numbers fall more than 20% below these estimates after optimization, you may have a specific bottleneck — a mismatched CPU/GPU pairing, RAM running in single-channel, or XMP/EXPO not enabled in BIOS.
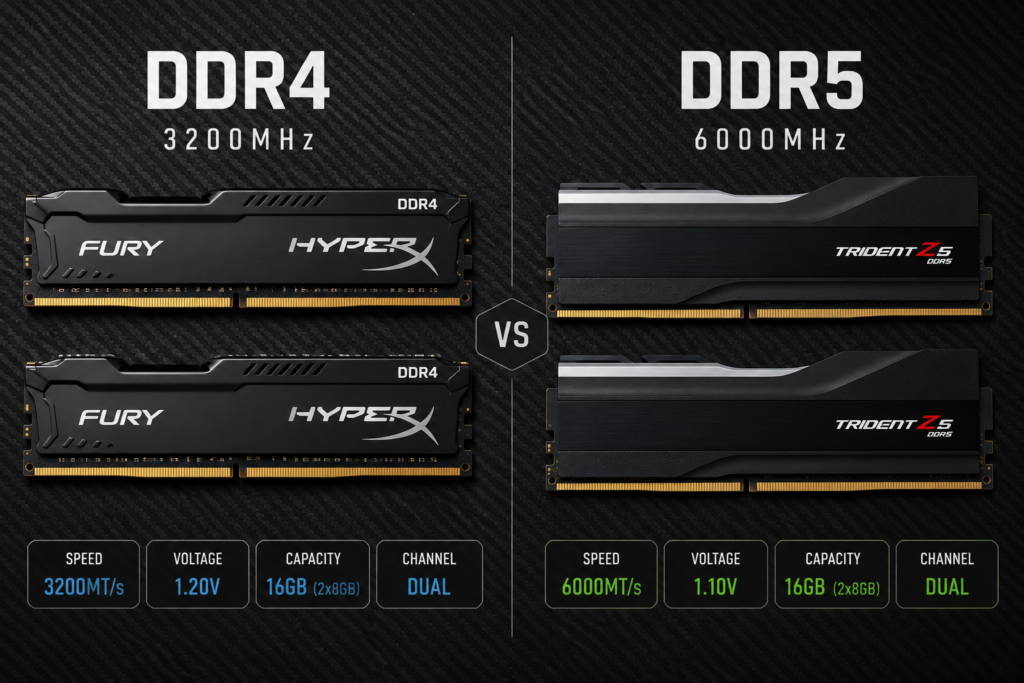
Step 7: Enable XMP/EXPO for Your RAM
This one step is missed by a surprisingly large percentage of PC gamers. DDR4 and DDR5 kits ship with a default JEDEC speed (2133 MHz or 4800 MHz) that’s well below what the kit is rated for.
- Restart → Enter BIOS (Delete, F2, or F12 depending on motherboard)
- Find XMP (Intel) or EXPO (AMD) profile
- Enable Profile 1
- Save and exit
On AMD Ryzen, memory speed directly feeds the Infinity Fabric clock. Going from 3200 MHz to 3600 MHz (DDR4) or 5600 MHz to 6000 MHz (DDR5) can reduce CPU bottlenecking by 5–10% in bandwidth-sensitive titles.
Putting It All Together
Learning how to lower CPU usage while gaming doesn’t require a single silver bullet — it’s a stack of optimizations that compound. Start with the free wins: kill background processes, fix your power plan, and enable XMP. Then move to in-game settings and driver updates. Only after exhausting those should you consider a hardware upgrade.
The goal isn’t just a higher average FPS number — it’s consistency. Smooth 120 FPS with stable 1% lows beats a volatile 160 FPS average that drops to 60 FPS every time an AI unit spawns.
Check your FPS potential: Before and after applying these tweaks, use fpscalculator.net to benchmark your hardware tier against community data — it’ll show you whether your system is performing at its ceiling or leaving performance on the table.